Sweg Motor Sweg Motor

How to Lubricate a Worm Gear Motor Properly?

Time:2026-09-20 Author:Mason
0%

A worm gear motor may look quiet and uncomplicated, yet its sliding tooth contact creates serious lubrication demands. That is why learning how to lubricate a worm gear motor properly begins with the manufacturer’s manual, not guesswork. Worm gears can generate considerable friction and heat, especially during continuous operation or frequent starts. The International Energy Agency estimates that electric motor systems consume about 46% of global electricity. Efficient lubrication can therefore support both reliability and energy performance, although it cannot correct poor alignment or excessive loading.

Heinz P. Bloch, a respected machinery-reliability authority, captures the principle clearly: “Lubrication is the lifeblood of machinery.” In practice, this means selecting the specified viscosity, checking the oil level at operating temperature, and using a compatible lubricant for the gear materials. ISO 12925-1 provides a recognized framework for industrial gear lubricants, while AGMA guidance supports proper viscosity and performance selection. Never assume automotive oil is suitable.

The mistake is simple.

Too much lubricant can be harmful. It may increase churning losses, raise temperature, and damage seals. Too little oil can leave the bronze worm wheel visibly scored, with a burnt odor near the housing. Reliable maintenance also includes inspecting leaks, measuring temperature trends, and recording lubricant changes. These details reflect common recommendations from the U.S. Department of Energy’s motor-system efficiency guidance and industrial reliability practices. Still, every gearbox differs. A careful technician should verify the oil grade, fill volume, drain interval, and ambient conditions before applying any procedure.
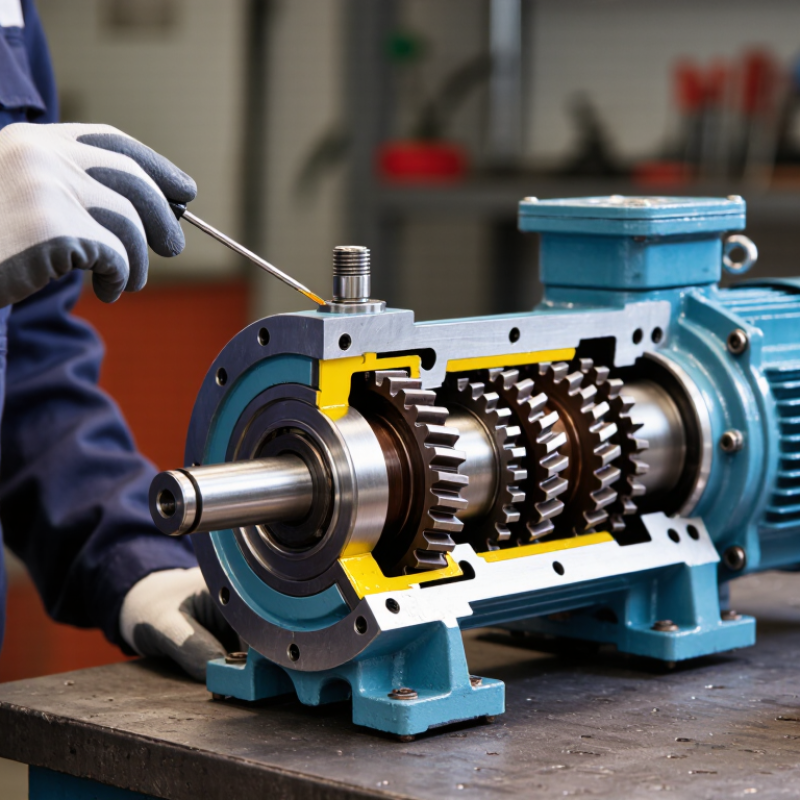
How to Lubricate a Worm Gear Motor Properly?

Identify the Worm Gear Motor’s Lubrication Requirements

Before lubricating a worm gear motor, identify what the gearbox actually requires. Start with its service manual and rating plate. Record the gear ratio, input speed, output torque, mounting position, and operating temperature. These details determine lubricant viscosity, fill volume, and replacement interval. A lubricant suitable for a slow, cool reducer may fail inside a fast, heavily loaded unit. Check the housing carefully. It should be clean, dry, and free from oil seepage.

Worm gears often generate considerable sliding friction, so ordinary machine oil is not automatically acceptable. Confirm whether the design requires gear oil or approved grease, then verify the recommended viscosity grade. Check compatibility with seals, bearings, and internal metals. Do not mix mineral and synthetic products unless technical documentation permits it.

If the motor operates outdoors, in dust, or near washdown areas, include those conditions in the assessment. Higher temperatures may require a different lubricant or shorter service interval.

Check the oil level with the motor stopped, isolated, and positioned as specified. The correct level may change with mounting orientation. Too little lubricant leaves teeth dry; too much can increase heat and leakage. Inspect drained lubricant for metallic particles, burnt odor, or cloudy contamination. These signs deserve investigation, not a quick refill. In field work, I have seen clean-looking housings hide worn seals. That is an easy mistake. Recheck the manual, measure carefully, and document the lubricant type, quantity, date, and operating conditions.

Gather Tools, Safety Equipment, and the Correct Lubricant

Before lubricating a worm gear motor, gather a torque wrench, clean lint-free cloths, a drain pan, gloves, safety glasses, and the service manual. Lock out electrical power and let the housing cool. Keep it dry. I also photograph the drain plug and oil level before opening anything. This small step prevents confusion when several plugs look identical.

Select lubricant by the manufacturer’s viscosity, load, temperature, and seal requirements. ISO 12925-1 provides recognized classifications for industrial gear oils, but it does not replace the motor manual. Never mix mineral oil with synthetic or polyglycol fluids unless compatibility is confirmed. Check the product data sheet for viscosity, operating temperature, and material compatibility. A wrong fluid can damage seals or increase heat. Not guesswork.

Clean around each plug before removal. Dirt entering the casing defeats careful lubrication. Add oil slowly, using a clean funnel, until the specified level is reached. Do not overfill; churning can raise temperature and leak through seals. The U.S. Department of Energy’s Operations & Maintenance Best Practices guide reports potential energy savings of 5–20% through effective maintenance practices. That supports careful lubrication, though actual results vary with load and alignment. I sometimes want to rely on appearance alone, but clear oil can still be unsuitable. Record lubricant type, quantity, date, temperature, and unusual noise. That record makes the next inspection more reliable.

Prepare the Motor Before Adding or Replacing Lubricant

How to Lubricate a Worm Gear Motor Properly?

Prepare the Motor Before Adding or Replacing Lubricant

Before lubricating a worm gear motor, prepare the machine, not just the lubricant. Disconnect electrical power and follow your site’s lockout procedure. Wait until the housing feels cool to the touch. Heat can thin oil and distort the true fill level. Check the service manual for lubricant type, quantity, and operating position. A grease-filled unit may require different preparation than an oil-filled unit.

Clean dust from the housing, drain plug, and filler area. Use a lint-free cloth because loose fibers can enter the gearbox. Inspect the casing, seals, plugs, and mounting points for cracks or leaks. If old lubricant looks metallic, milky, or unusually dark, pause and investigate. Replacing it without checking the cause may hide bearing or gear damage. I have found that rushing this inspection creates more work later. Remove the drain plug carefully, and place a clean container underneath. Let used oil drain fully before fitting the plug again.

Tips: Keep the motor level when checking the lubricant. Confirm the correct fill mark twice. Never mix unknown lubricants. Record the date, lubricant type, and operating hours. Small records help reveal slow leakage or overheating.

How to Lubricate a Worm Gear Motor Properly: Prepare the Motor Before Adding or Replacing Lubricant

The chart compares common ISO VG industrial gear-oil viscosity grades by their nominal kinematic viscosity at 40°C. Before adding or replacing lubricant, stop and isolate the motor, allow the housing to cool, clean the filler and drain areas, inspect for leaks or contamination, and confirm the lubricant grade specified for the gearbox. A higher viscosity grade is not automatically better; the correct choice depends on the gearbox design, operating temperature, speed, load, and service instructions.

Apply Lubricant to the Worm Gear Housing Step by Step

How to Lubricate a Worm Gear Motor Properly?

Apply Lubricant to the Worm Gear Housing Step by Step

A worm gear motor needs the correct lubricant and a clean working area. Check the service manual before opening the housing. It should specify the oil type, viscosity, capacity, and filling position. Do not mix different lubricants. Their additives may react or reduce protection.

Switch off the motor and let the housing cool. Lock out the power supply. Wipe dust from the fill and drain plugs. Place a tray underneath. Remove the drain plug slowly, because warm oil may still flow under pressure. Let the old lubricant drain completely. Inspect it for metal flakes, water, or a burnt smell. These signs need professional attention.

Replace the drain plug and seal if damaged. Add the specified lubricant through the fill port. Use a clean funnel, not an open container. Stop at the recommended level. Overfilling can cause foaming, heat, and seal leakage. Underfilling leaves the worm and wheel poorly protected. Small steps matter.

I prefer adding oil gradually. Then I wait briefly and check the level again. The oil may settle inside the housing. I once filled a unit too quickly and misread the level. That mistake was avoidable. After closing the port, run the motor briefly without load. Listen for unusual noise and check the housing temperature. Inspect around the seals after operation. A slight leak should never be ignored.

How to Lubricate a Worm Gear Motor Properly? - Apply Lubricant to the Worm Gear Housing Step by Step

Step Task Recommended Practice Key Checks Typical Timing or Condition
1 Identify the gearbox design Confirm whether the worm gear housing uses oil, grease, or is factory-filled and sealed. Use only the lubricant type and viscosity specified for the unit. Check the data plate, service manual, fill-plug markings, and housing instructions. Before the first service and whenever the lubricant type is uncertain.
2 Shut down and isolate the motor Switch off the equipment, disconnect the power supply, and prevent unexpected startup before opening the housing. Verify zero energy, allow hot components to cool, and secure any driven load. Every time lubrication or inspection is performed.
3 Clean the housing and fittings Remove dust, metal particles, and old residue from the breather, fill plug, drain plug, and surrounding surfaces. Keep contaminants out of the housing and ensure the breather passage is not blocked. Immediately before removing any plug or fitting.
4 Inspect the existing lubricant Look for darkening, a burnt odor, metallic particles, water contamination, foaming, or a milky appearance. Unusual noise, excessive heat, leakage, or visible wear may indicate a mechanical problem rather than a simple lubrication issue. At every scheduled service and after abnormal operation.
5 Drain old oil when applicable Place a suitable container below the drain port. Drain the oil while it is warm enough to flow, but not hot enough to cause burns. Inspect the drained oil for particles and dispose of it according to local regulations. When the housing is oil-lubricated and an oil change is required.
6 Select the correct lubricant Use the specified industrial gear oil or compatible worm-gear grease. Do not mix different lubricant chemistries unless compatibility is confirmed. Confirm viscosity, operating-temperature range, additive compatibility, and suitability for the gear materials and seals. Before filling or replenishing the housing.
7 Fill the worm gear housing Add oil through the fill port until the level reaches the specified mark or level-plug opening. For grease-packed units, add only the specified quantity. Avoid overfilling, which can increase churning, temperature, pressure, and seal leakage. After draining, leakage repair, or when the level is below the required mark.
8 Reinstall plugs and seals Clean the threads, replace damaged sealing washers or O-rings, and tighten plugs to the specified torque. Make sure the breather is installed correctly and all service openings are sealed. Immediately after filling or inspection.
9 Run and monitor the motor Operate the motor briefly under normal conditions, then check for leaks, unusual sound, vibration, and abnormal temperature rise. Stop the unit if leakage, grinding, severe vibration, or rapid overheating occurs. After every lubricant change or major service.
10 Record the service Document the date, operating hours, lubricant type, quantity, lubricant condition, and any observed leakage or wear. Use the record to establish a maintenance trend and adjust the interval only according to approved service guidance. At the end of each lubrication service.
Important: Lubricant type, fill level, quantity, and replacement interval vary by worm gear motor design, mounting position, load, speed, temperature, and operating environment. Always give priority to the equipment manufacturer's service instructions.

Inspect, Test, and Schedule Future Lubrication Maintenance

Before adding lubricant, inspect the worm gear motor carefully. Stop the motor and isolate its power source. Look for oil leaks, cracked seals, loose plugs, and dust around the housing. Check the lubricant level only when the motor is cool and positioned correctly. A milky film suggests moisture contamination. Metallic particles may indicate gear or bearing wear. Do not mix lubricants with different bases or viscosities. Use the service manual to confirm the correct lubricant and quantity.

After lubrication, test the motor under controlled conditions. Run it without a load, then observe it during normal operation. Listen for grinding, rhythmic knocking, or unusual vibration. Check the housing temperature with a thermometer, not just your hand. Compare the reading with previous maintenance records. If noise or heat increases after servicing, stop and investigate. Too much lubricant can also create heat. More is not always better.

Create a lubrication schedule based on operating hours, load, speed, temperature, and dust exposure. Record the date, lubricant type, amount, temperature, and inspection findings. Set the next service date before returning the motor to production. Shorten the interval in wet or dusty areas. Review the schedule after seasonal changes or process modifications. I once treated a regular calendar reminder as sufficient, but the motor worked twice as hard during peak production. That mistake showed me that actual operating conditions must guide maintenance timing.

FAQS

What information should I check before lubricating a worm gear motor?

Read the service manual and rating plate. Record the gear ratio, input speed, output torque, mounting position, and operating temperature. These details determine lubricant type, viscosity, quantity, and replacement timing.

Can I use ordinary machine oil in a worm gear motor?

Not automatically. Worm gears create substantial sliding friction. Confirm whether the unit requires gear oil or approved grease, then verify the specified viscosity.

Why is lubricant compatibility important?

The lubricant must suit the seals, bearings, and internal metals. Do not mix mineral and synthetic products unless technical documents allow it. Additive reactions can reduce protection.

How should I check the lubricant level?

Stop and isolate the motor before checking. Position it as specified because mounting orientation changes the correct level. Too little lubricant exposes the teeth, while too much increases heat and leakage.

What should I inspect in drained lubricant?

Look for metal flakes, water, cloudy contamination, or a burnt smell. These signs may indicate wear or overheating. A quick refill is not enough.

What is the safe procedure for changing the lubricant?

Switch off the motor and lock out the power supply. Let the housing cool. Clean the plugs, place a tray underneath, and remove the drain plug slowly.

How much lubricant should I add?

Add the specified lubricant through the fill port with a clean funnel. Stop at the recommended level. Add it gradually, then wait briefly and check again.

What should I check after lubrication?

Close the fill port and run the motor briefly without load. Listen for unusual noise and check the housing temperature. Inspect the seals afterward. Never ignore a small leak.

What outdoor conditions affect lubrication maintenance?

Dust, outdoor exposure, washdown areas, and high temperatures can shorten the service interval. They may also require a different lubricant. The manual remains the best reference.

What maintenance details should I document?

Record the lubricant type, quantity, date, and operating conditions. Include unusual noise, heat, or leakage. I once misread a level after filling too quickly; waiting would have prevented that mistake.

Conclusion

Proper lubrication is essential for keeping a worm gear motor efficient, quiet, and reliable. This guide explains how to lubricate a worm gear motor properly by first identifying the motor’s lubrication requirements, including the recommended lubricant type, quantity, and service interval. Before beginning, gather suitable tools, protective equipment, cleaning materials, and the correct lubricant. Disconnect the motor from its power source, allow it to cool, and clean the housing around the fill and drain points to prevent contamination.

The lubrication process includes removing old lubricant when necessary, checking for leaks or unusual wear, and adding the new lubricant gradually to the specified level. Avoid overfilling, as excessive lubricant can increase pressure and operating temperature. After sealing the housing, inspect the motor for loose fittings or damage, reconnect it safely, and run a brief operational test. Finally, record the maintenance date and establish a future schedule based on operating conditions, workload, temperature, and manufacturer guidance. Regular inspections and timely lubrication can help extend service life and maintain consistent performance.

Mason

Mason

Mason is a seasoned marketing professional with a deep expertise in the company's offerings and a passion for driving brand awareness. With a strong background in digital marketing strategies, he has an innate ability to connect with diverse audiences and effectively communicate product benefits.......